
Being in Southern California, we get a lot of wonderful light during the final hours of most days, so naturally, a lot of my photography happens during that time. Consequently, I find myself in position to photograph sunsets a lot, many of which can prove to be quite spectacular, and one of my favorite effects is to catch sun stars (also called starbursts) and silhouettes during this time. I’ve been asked more than a few times what my methods for sunset photography are, so figured I’d share a few tips to help you catch those perfect sun shots during your summer adventures. Click past the break here to see the tips.
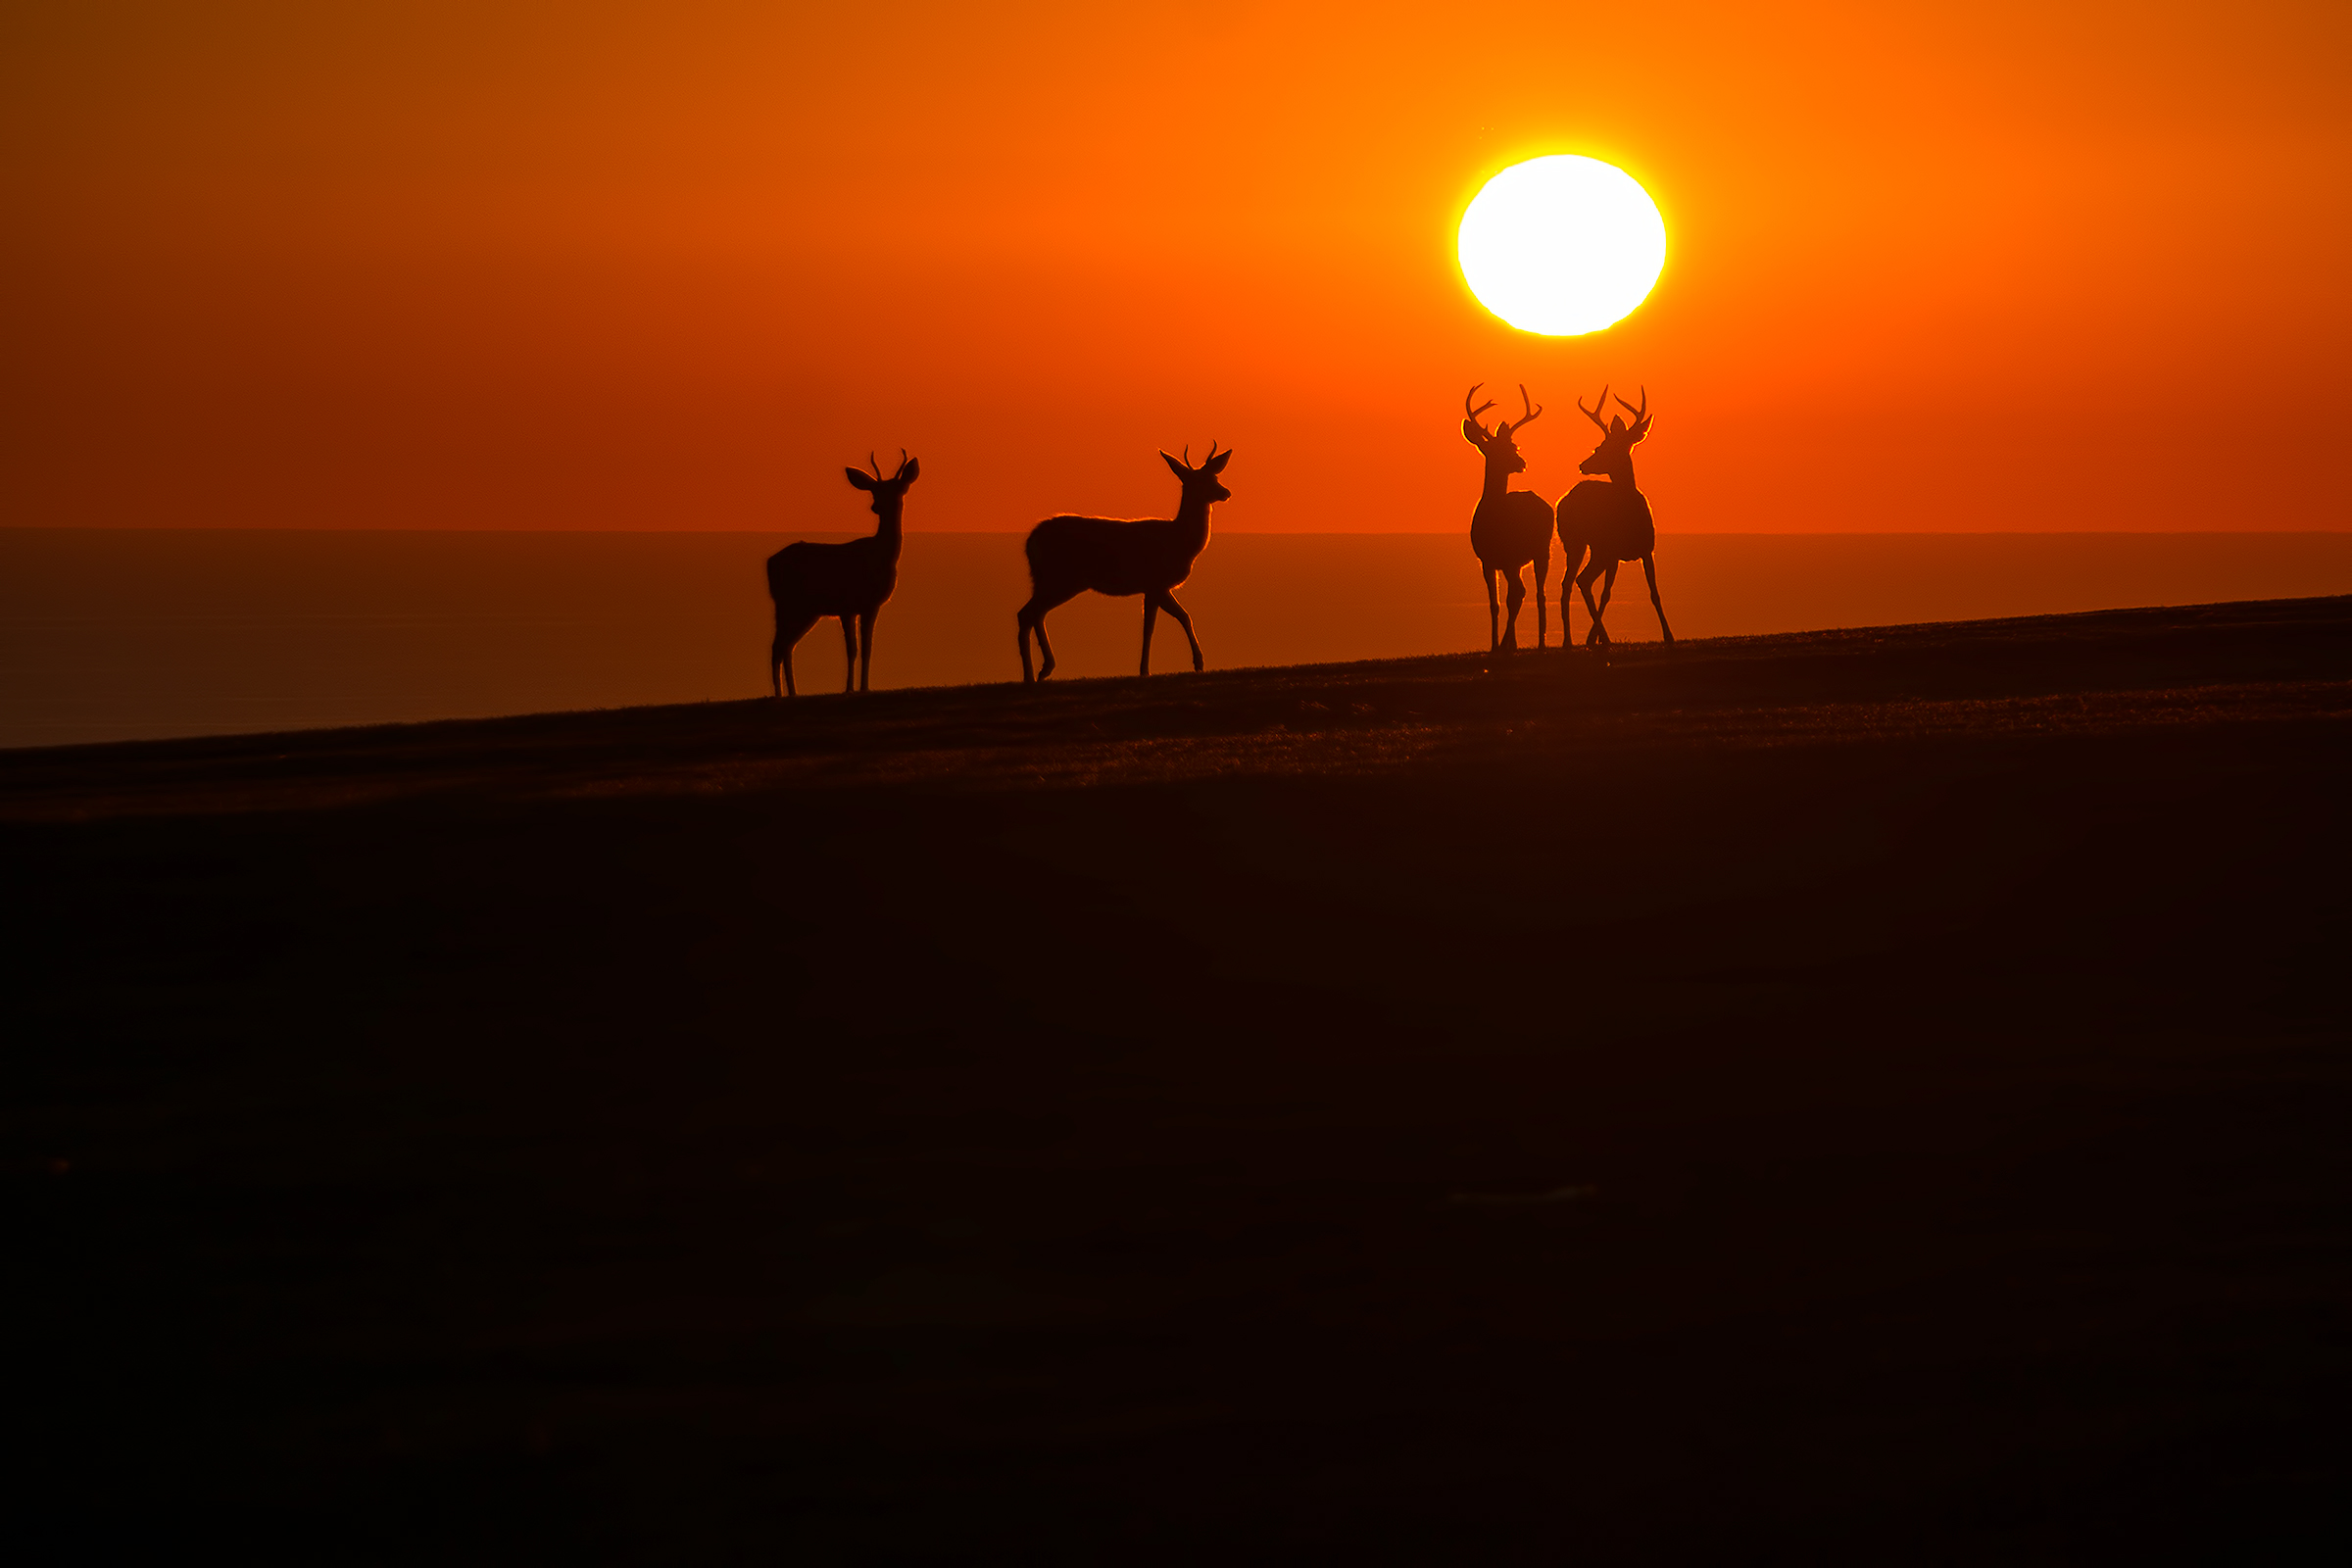
1. Silhouettes - If it’s a silhouette that you’re trying to capture, such as the deer along the ridge in the image above, or the palm trees in the foreground of that sunset sky in the image in this link, then I usually shoot in Aperture Priority mode and meter for the brightest spot on the scene, usually the sky just around the sun. I’ll then use exposure compensation, the little button that with the +/- symbol that normally looks something like the one below here, to underexpose the image by about a stop, sometimes even two full stops, and if I’m feeling particularly crazy, sometimes up to 3 full stops, depending on how bright the light happens to be that day or time of day.

Exposure Compensation Button
I do this so that the bright light isn’t obscenely overexposed to the point you lose all detail. Finally, if necessary, I”ll bring up some of the details in post in Lightroom using the shadow and highlights sliders to taste. Remember…this is art.
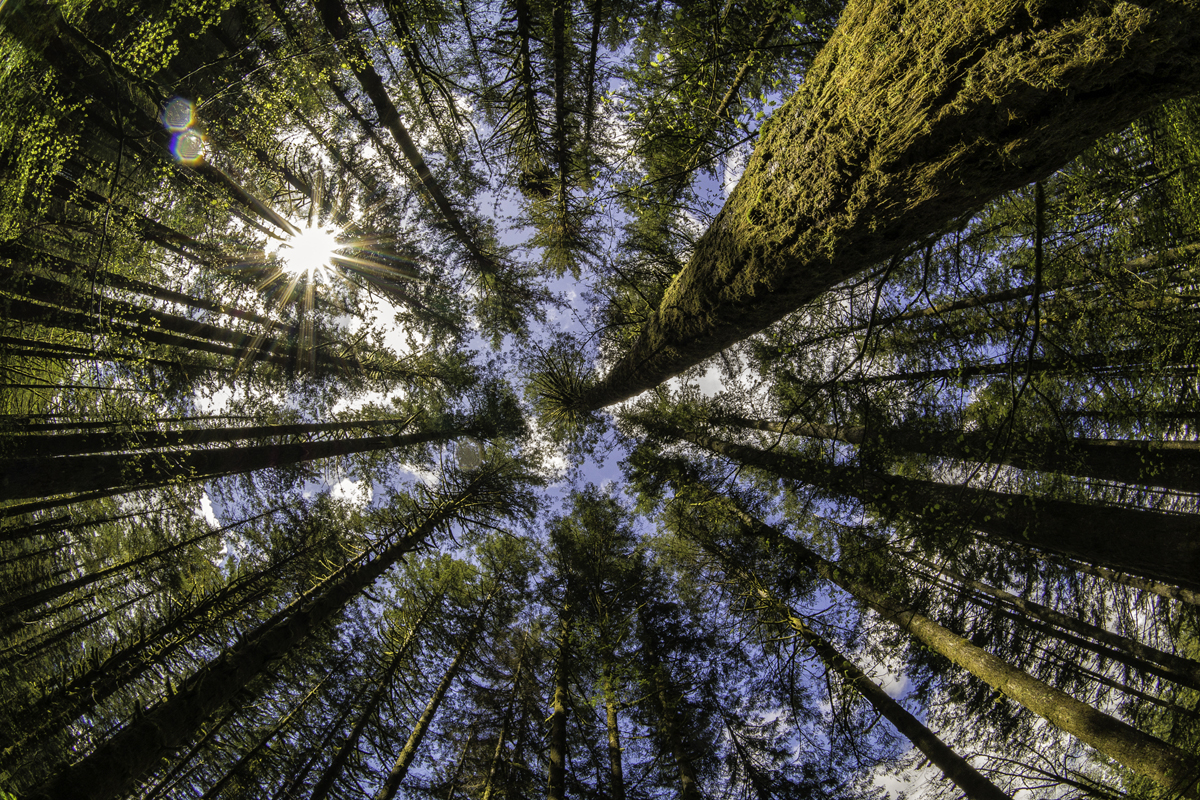
2. Starbursts - If I’m looking to get the starburst effect such as in the image of the tree canopy above or the Topanga Canyon sunset in the image in this link, it’s best to stop up to f16 or even smaller, usually best at about f18 or f22. Then I’ll frame the shot so the sun is partially obstructed by a tree/hillside/ridgeline/building/leaf/something. Shooting at that small aperture is what will give you that starburst you see in some of them. The effect is a result of what is called light diffraction. In essence, this is when light waves bend around something in their way, causing the waves to spread out. In this case, the ’something in their way’ are the diaphragm blades in the lens. The number of blades inside your particular lens will dictate how many points you get in your starbursts. Typically, the higher end lens will give you more points and a cleaner starburst, but these days, pretty much any lens will give you more than satisfactory results.
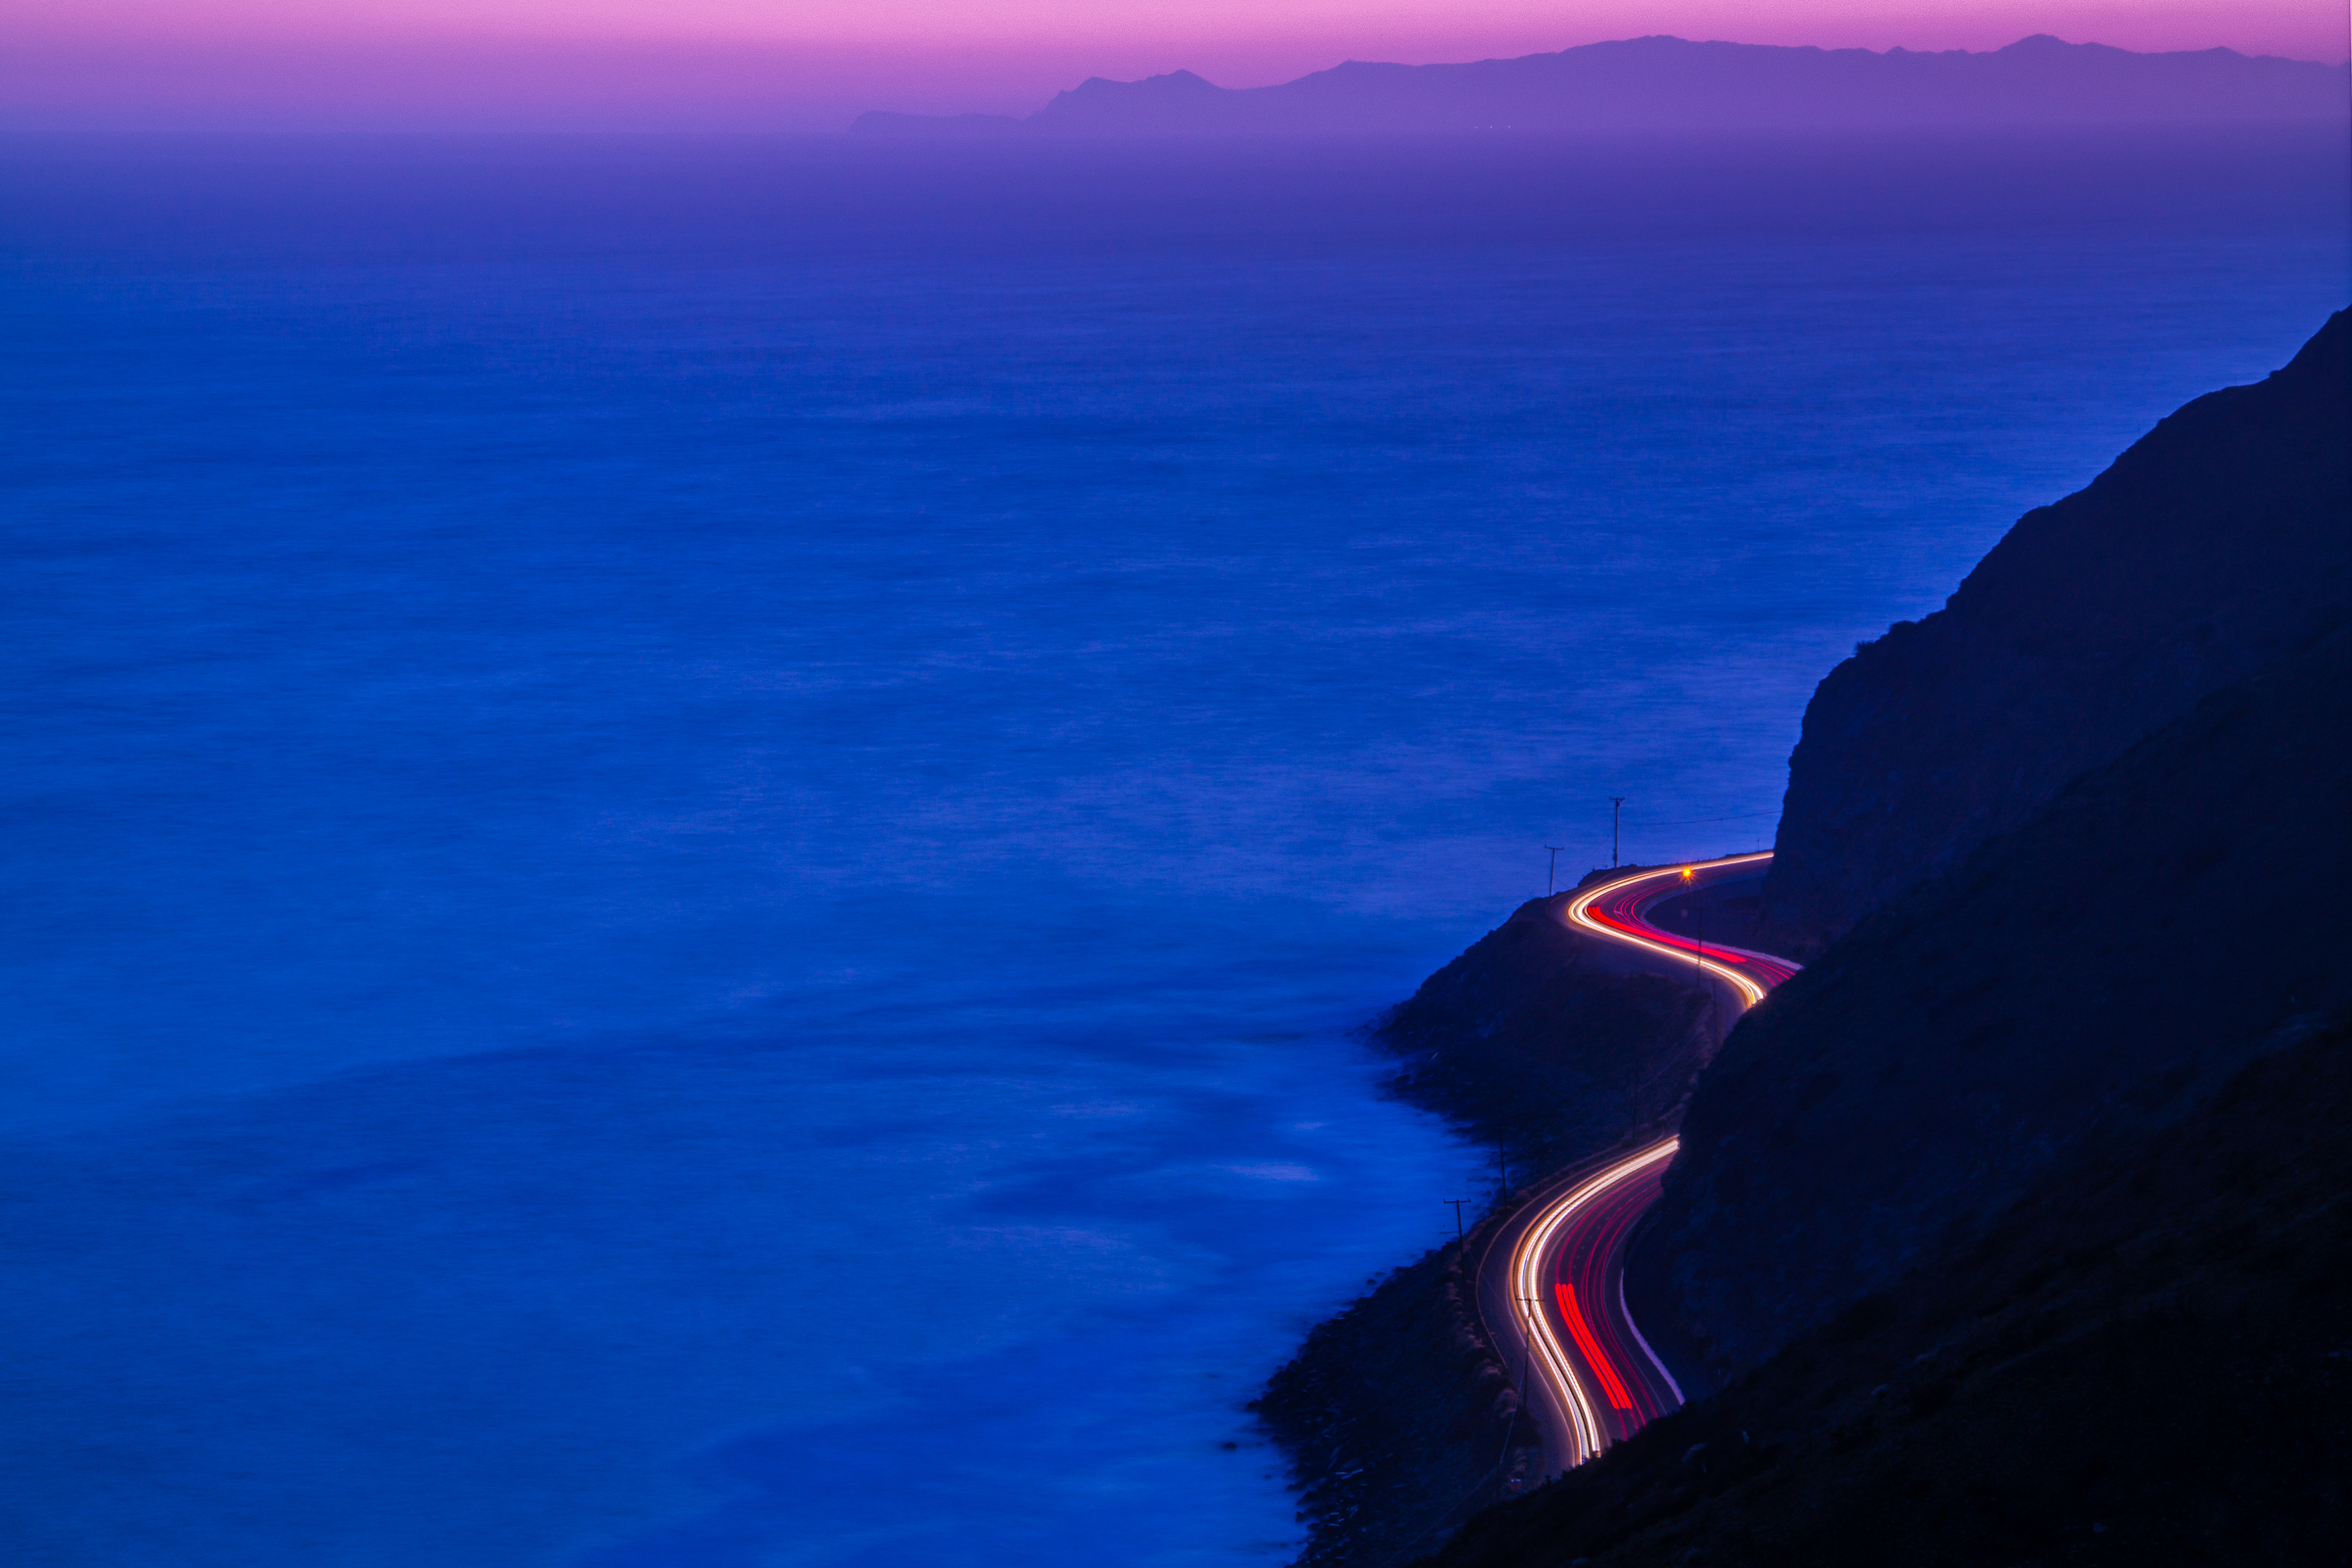
3. Dusk/Twilight - If the sun isn’t directly in the shot, but you’re looking to capture the dusk/twilight light like the one of the Pacific Coast Highway you see above, then I typically expose for the sky if I’m looking to silhouette or darken the mountains/landscape. Conversely, I might decide to expose for the mountains to get some detail in there, and then use exposure compensation to stop down about a stop or so in order to not blow out the sky too much, still preserve some visible detail in the mountains, and still be able to capture those surreal colors that happen in those 15-20 minutes of perfect twilight after the sun sets behind the horizon. I’ll often also set the white balance to ‘cloudy’ even if it’s not cloudy as it helps warm up the scene and saturates the colors a bit. A few minimal tweaks of the shadow, highlights, and sometimes the contrast and vibrance sliders in Lightroom, and you’ve got yourself some awfully purty colors!
One final tip is to make sure your lens is clean, especially when shooting images where the sun is a major component such as lens flare or starburst shots. Otherwise, you WILL get very visible unwanted dust specks and artifacts in your images.
Well, I hope those tips help you during your summer adventures. Let me know if they help you capture some fun shots. I’d love to see them!
By the way, all the shots you see above were shot on either the Samsung NX300 or the Samsung NX30, both of which are mirrorless cameras and provided to me as part of the Samsung Imagelogger program. Both of which I absolutely highly recommend and have turned into my primary cameras. If you decide to purchase through Amazon, try the links above! They'll take you directly to the cameras I used and they'll show me a bit of love for sending you that way...
For more of my madness: Instagram: @wasimofnazareth Twitter: @wasimofnazareth Google+: www.Google.com/+WasimMuklashy Facebook: www.Facebook.com/WasimOfNazareth